


For years, home broadband in Nigeria meant managing a fluctuating mobile hotspot or paying a premium upfront for a satellite setup like Starlink. MTN Nigeria has disrupted this landscape with MTN FibreX, a Fiber-to-the-Home (FTTH) service delivering high-speed, uncapped internet. Capturing over 88% of the country’s fixed broadband market, this fiber network delivers dedicated fiber optic cabling directly to residential and commercial properties.
This comprehensive technical guide outlines the architecture, onboarding, and configuration workflow for Setting Up MTN FibreX successfully.
Pre-requisites Before Setting Up MTN FibreX
MTN operates its unlimited network over localized Fiber Access Terminals (FAT). Before initiating the physical installation, confirm that you meet these essential environmental and structural preconditions:
- Physical Infrastructure: A clear path from the street-level utility pole or underground conduit to your building’s exterior wall.
- Power Continuity: An Optical Network Terminal (ONT / Fiber Router) requires constant AC power. When Setting Up MTN FibreX, integrating an uninterrupted power supply (UPS) or an inverter system is highly recommended to bridge grid outages.
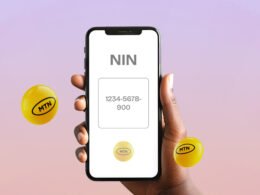
- Documentation: A valid National Identification Number (NIN) is mandatory for line registration and KYC compliance. [1]
Phase-by-Phase Process for Setting Up MTN FibreX Router
Deployment begins by verifying network availability at your exact geographic coordinates and follows a structured physical-to-digital installation workflow.
[Verify Coverage via eShop/App] ➔ [Submit NIN & KYC Form] ➔ [Sales/Technical Assessment]
1. Coverage Validation and Digital Provisioning
- Initiate the Request: Navigate to the MTN eShop Portal or launch the myMTN NG App. Select the FibreX Base Plan option.
- Geolocate Your Node: Input your State and precise street address. The database cross-references your location against active local FAT infrastructure.
- Submit KYC Profiles: If your zone is “Fibre Ready”, complete the digital application by attaching your NIN and contact information to begin Setting Up MTN FibreX.
- Sales Intake: An MTN agent will contact you to schedule an onsite physical deployment window.
2. Physical Hardware Installation Workflow
On your scheduled date, an accredited engineering crew will handle the hardware components of Setting Up MTN FibreX, which typically takes about 2 hours.
- Drop Cable Routing: The technicians locate the nearest FAT drop box on the street. They will run a ruggedized, weather-resistant outdoor fiber optic drop cable directly to your building. [1, 2]
- Entry and Structural Core Fixing: The drop cable passes inside via a precision-drilled structural puncture, protected by clean plastic conduit trunking to prevent micro-bends or fractures in the glass core.
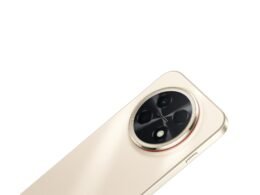
- Terminal Splicing & ONT Patching: The outdoor cable merges into an indoor Optical Rose Box (ORB) via a fusion splicer. A flexible fiber patch cord then routes from the ORB into the Optical Network Terminal (ONT)—typically a Huawei OptiXstar router.
(Note: MTN currently waives all hardware equipment costs and installation labor fees under promotional terms. The physical router is free to use while the account remains active). [1]
                     ┌───────────────────────────┐
                     │   MTN Fiber Access Box    │
                     └─────────────┬─────────────┘
                                   │ (Outdoor Drop Cable)
                                   ▼
                     ┌───────────────────────────┐
                     │  Indoor Optical Rose Box  │
                     └─────────────┬─────────────┘
                                   │ (Fiber Patch Cord)
                                   ▼
                     ┌───────────────────────────┐
                     │  Huawei OptiXstar Router  │
                     └───────────────────────────┘
Accessing the Huawei ONT Web Interface
Once the physical links show stable green LEDs (indicating a locked downstream optical signal), you must log into the local gateway interface to configure your network parameters and finish Setting Up MTN FibreX at the device level.
Local Interface Configuration Steps
- Connect a laptop to one of the ONT’s LAN ports via an Ethernet cable, or connect to the default Wi-Fi SSID printed on the router’s base sticker.
- Open a web browser and input the default local gateway address:
192.168.100.1. - Bypass the browser’s SSL self-signed certificate warning if prompted.
- Input the
rootadministrative credentials located on the physical sticker underneath the unit.
Updating Security and Wi-Fi Credentials
- Navigate to the WLAN tab within the dashboard management menu.
- Select your active SSID profiles (configured for concurrent 2.4 GHz and 5 GHz distribution bands).
- Update the SSID Name and modify the Pre-Shared Key (Password).
- Set your encryption profile to WPA2-PSK or WPA3-SAE to maximize secure edge protection. Click Apply to complete this phase of Setting Up MTN FibreX.
Subscription Activation and Management
The service allocates network access based purely on bandwidth tiers rather than data limits, offering unrestricted downloads. Every line maps to a unique identifier known as a FibreX Number / FN ID.
2026 Tier Architecture and Pricing Breakdown
| Bandwidth Tier [1, 2] | Monthly Fee (NGN) | Ideal Operational Workloads |
|---|---|---|
| 50 Mbps | ₦30,000 | 4K video streams, basic home office networking |
| 100 Mbps | ₦45,000 | Multi-device smart homes, concurrent video conferencing |
| 200 Mbps | ₦70,000 | Heavy content creation, large file uploads, low-latency gaming |
| 300 Mbps | ₦100,000 | Smalls-to-Medium Enterprises (SMEs), local tech hubs |
| 1 Gbps | ₦200,000 | High-density dev teams, corporate office architecture |
How to Renew via the myMTN NG App
- Launch the myMTN NG mobile app.
- Click on the Broadband / FibreX control tile.
- Input your assigned FN ID.
- Choose your target speed package, complete the checkout process using your debit card or MoMo wallet, and the line will immediately re-provision.
Alternatively, you can trigger quick modifications on linked lines by sending a text containing FIBER to 461 via an MTN mobile number.
Troubleshooting Common MTN FibreX Setup Issues
If you experience deployment hiccups or dropping connections during or immediately after Setting Up MTN FibreX, cross-reference these hardware indicator states before calling support:
- LOS LED Blinking Red: This indicates a Loss of Signal. There is a break or severe bend in the fiber optic cable outside or at the patch box. Inspect your indoor patch cable for tight twists. If clear, contact MTN support to check the street utility line. [1]
- PON LED Blinking Green: The router is attempting to handshake and register with the MTN Central Office OLT terminal. If it flashes indefinitely while you are Setting Up MTN FibreX, your account provisioning profile is pending activation on MTN’s backend.
- LAN LED Off: The physical Ethernet connection between the router and your computer or external switch is disconnected. Swap the RJ45 cable or toggle the network adapter interface on your operating system.
Following these comprehensive installation steps ensures your local network is fully optimized, secured, and ready to deliver consistent gigabit-tier performance.
Comparatively, MTN FibreX offers a superior, more cost-effective, and lower-latency broadband experience (1ms–15ms) in Nigeria compared to Starlink’s high-cost, satellite-based service. While FiberX is restricted to specific urban zones, it provides unmatched performance for gaming and large uploads, whereas Starlink offers wider availability despite higher hardware costs and weather susceptibility. For a detailed price and component breakdown of Starlink kits in Nigeria, see this Space in Africa analysis.

The WIRED.Africa's Press Desk delivers breaking news, official announcements, and timely updates on technology, business, innovation, and digital policy. Stories published under this byline are produced through the collaborative efforts of the editorial team and trusted news sources.